Showing posts with label Interactive Layout. Show all posts

Friday, March 18, 2011

Family Bliss

The explosion layout that I created for my class at Memories and More is for Sam's album, so naturally I had to make another layout for Lucy's album.
I used the same Magician's Choice pattern from Jeanette Lynton's How To Book Magic and wrapped little presents which when opened reveal additional space for photos and journaling. This time instead of black and white I printed the photos in sepia.
Recipe:
Magic - Magician's Choice Pattern
X7132B Bliss Paper Packet
B1371 Bliss Stamp Set
Z2111 Chocolate Stamp Pad
Z2124 Grey Flannel Stamp Pad
1395 Vellum
Z1333 Mocha Opaques
Z1331 Foundry Flourishes (retired CTMH)
Chocolate Polka-dot Organdy Ribbon (retired CTMH)

Happy Scrapping!
Jen Lee

Wednesday, March 16, 2011

New Interactive Layout Class at Memories and More!

Join me at Memories and More in Forest Lake to create this unique Heritage Explosion Layout with My Mind's Eye Andrea Victoria papers. I took the explosion or squash book technique and added it to a layout in place of a patterned piece of paper using the "Magician's Choice" pattern from Jeanette Lynton's How To Book Magic. Untie the bows and open three little gifts - extra room for photos and journaling!
This layout features a 6x6 photo along with eleven supporting 3x3 photos. This technique is perfect for keeping those little jewels tucked away for the more invested viewer. 

Papers will be precut and ready to assemble. Class size is limited, call today to reserve your space! If you cannot make it on the scheduled date, choose a class kit instead. I will put the layout together for you and you can pick it up after class. 

Please bring the following tools and supplies to class: black stamp pad and sponge or chalk ink (for distressing edges), foam tape, tape runner, scissors, 12" paper trimmer, bone folder. You may also bring your page protectors to class if you would like assistance altering them to accommodate the interactive elements of the layout.

This class will be held Monday, March 28, at 6:00 pm, for $25. Please call Julie at 651.464.3424 to sign up for class.

Happy Scrapping!

Monday, January 31, 2011

"Trim the Tree" Frame-Up Layout Class

Last chance to sign up for my Monday class in Forest Lake, MN. Contact Memories and More to join in the fun at 651-464-3424. If you want the layout but can't make the class, ask for a class kit instead. I'll put together the layout for you and you can pick it up at the store any day after class.

Monday, January 31, 6:00 pm
Using Bo Bunny's "Believe" and "Holiday Magic" papers we will create a fun layout using the frame-up technique.  This fun technique will allow plenty of extra hidden space for journaling and additional photos. As a side note, my 8-year old niece took these photographs. It's fun to showcase her pictures in a special layout.
Recommended picture sizes:  (9) 5"x5", (4) 4"x4"
Tools/Supplies:  tape runner, liquid glue, glue dots, scissors, scoring tool, bone folder
Contact Memories and More to sign up for class at 651-464-3424.  Cost $25.

Wednesday, September 8, 2010

Scrapbook Shop Interactive Layout Class - Hidden Journaling

Date:  Wednesday, September 22, 2010
Time:  6:00 – 8:00 p.m.
Cost:  $20

Contact the Scrapbook Shop to sign up at 651-698-7979.  View their website for more information.

Hide your journaling notes for your more invested viewers.  Papers will be pre-cut, there will be some hand cutting.  Class size is limited please sign up today to reserve space for you and a friend.

Bring your page protectors to class for assistance in placing the beach ball stripe to hide/reveal your journaling.

Photo Sizes:  (1) 7x5, (3) 4x4


This layout was created using the "Backstage" pattern from Jeanette Lynton's new how to book "MAGIC".  Contact me to order your copy today!

Wednesday, September 1, 2010

Scrapbook Shop Interactive Layout Class - Revolving Door

Date:  Wednesday, September 15, 2010


Time:  6:00 – 8:00 p.m.
Cost:  $20

Contact the Scrapbook Shop to sign up at 651-698-7979.  See their website for more details.

Put a new spin on your layouts with these happy pages.  We will create a spinner which will show two photos at a time of the feature.  Most papers will be pre-cut, there will be some hand cutting.  Class size is limited please sign up today to reserve space for you and a friend.

Bring your page protectors to class for assistance in placing the spinner.

Photo Sizes:  (4) 3x3 (to be trimmed into pie pieces), (2) 4x3, (2) 5x3


This layout was created using the "Crystal Ball" pattern from Jeanette Lynton's new how to book "MAGIC".  This is a must have for every scrapbookers library.  Contact me today to order your copy.

Wednesday, August 25, 2010

Scrapbook Shop Interactive Layout Class - Page Window Pullout

Date:  Wednesday, September 8, 2010
Time:  6:00 – 8:00 p.m.
Cost:  $20

Contact the Scrapbook Shop to sign up at 651-698-7979.  See their website for more details.

Create this fun layout featuring a window with a pull-out.  Now you see it (journaling), pull the top tab and now you don’t (you see pictures).  This layout will showcase any outdoor photos.  Papers will be pre-cut.  Class size is limited please sign up today to reserve space for you and a friend.

Photo Sizes:  (1) 8x10, (3) 4x6, (2) 4x4½


This layout was created using the "Now You See It" layout from Jeanette Lynton's new how to book "MAGIC".  The book will be available starting September 1st.  Please contact me today to reserve your copy, it is a definite must have for any scrapbookers library.

Wednesday, August 18, 2010

Scrapbook Shop Interactive Layout Class - Journal Pullouts

Date:  Wednesday, September 1, 2010
Time:  6:00 – 8:00 p.m.
Cost:  $20

Contact the Scrapbook Shop to sign up at 651-698-7979.  See their website for more details.


Pull this fun layout together using We R Memory Keepers Old Glory papers.  This is a versatile layout perfect for photos of scouting, family reunions, 4th of July, military, etc.  We will learn how to place fun hidden journal pullouts into a layout.  Most papers will be pre-cut, there will be some hand cutting in class.  Class size is limited please sign up today to reserve space for you and a friend.

Bring your page protectors to class for assistance in cutting them to access the journal pullouts.  Please bring a craft knife and ruler to cut them.

Photo Sizes:  (1) 6x6, (3) 3x3, (2) 4x6

Tools/Supplies:  12” paper trimmer, scoring tool/bone folder, sharp scissors, tape runner, glue dots, foam tape/pop dots, 1¼” circle punch.  There will be some tools available in class to share.

This layout was created using the "Love Potion" pattern in Jeanette Lynton's new how to book "MAGIC".  This fantastic book will be available starting September 1st.  Contact me today to reserve your copy of "MAGIC".  

Thursday, August 12, 2010

Scrapbook Shop Interactive Layout Class - Memorabilia Envelope

Date:  Wednesday, August 25, 2010
Time:  6:00 – 8:00 p.m.
Cost:  $20

Contact the Scrapbook Shop to sign up at 651-698-7979.  See their website for more details.


Create this lovely layout using banana leaf paper as an accent and Tim Holtz’s new Tattered Florals die.  This layout will hold photos plus any special keepsakes you have from the occasion.  Most papers will be pre-cut, there will be some hand cutting in the class.  Class size is limited please sign up today to reserve space for you and a friend.

Bring your page protectors to class for assistance in cutting them to access the memorabilia envelope.  Please bring a craft knife and ruler to cut them.

Photo Sizes:  (8) 4x3


This layout was created using the "Parlor Trick" layout from Jeanette Lynton's fabulous NEW How To Book "MAGIC"!  This is my favorite how to book from her so far.  You can get your hands on a copy starting September 1st.  Contact me today to reserve your copy of "MAGIC"!

Monday, April 19, 2010

Lucy's 3rd Birthday - Layout 2 of 3

For birthday's I usually do 2-3 layouts for the kids.  Mostly because that is when I take the most pictures and don't want to leave anyone out who was there.  For Lucy's 3rd birthday, the first layout was done in the Miracle Kit, see the next post.  This layout was created using a retired paper pack and stickease and some very cute brads that I found at Bargain Bill's in Rice Lake, WI. 
There were too many pictures left over that I wanted to use, but I did not want to have 4 layouts for her birthday, so I compromised and made flaps for the additional pics.  When I put the layout into page protectors, I'll make a slit in the protector and pull the flap through so it can be opened when looking at the layout.
Thanks for looking!
Jen

Friday, April 16, 2010

My Miracle Kit Layouts

The new Miracle Kit from Close to My Heart is available now until the end of May 2010.  This kit includes product and directions to complete two wonderful layouts.  They were a snap to put together - four pages in under two hours!

The kit allows for some color interpretation.  You can pick a color from your pictures as the coordinating color for the embellishments to make the layout all your own!

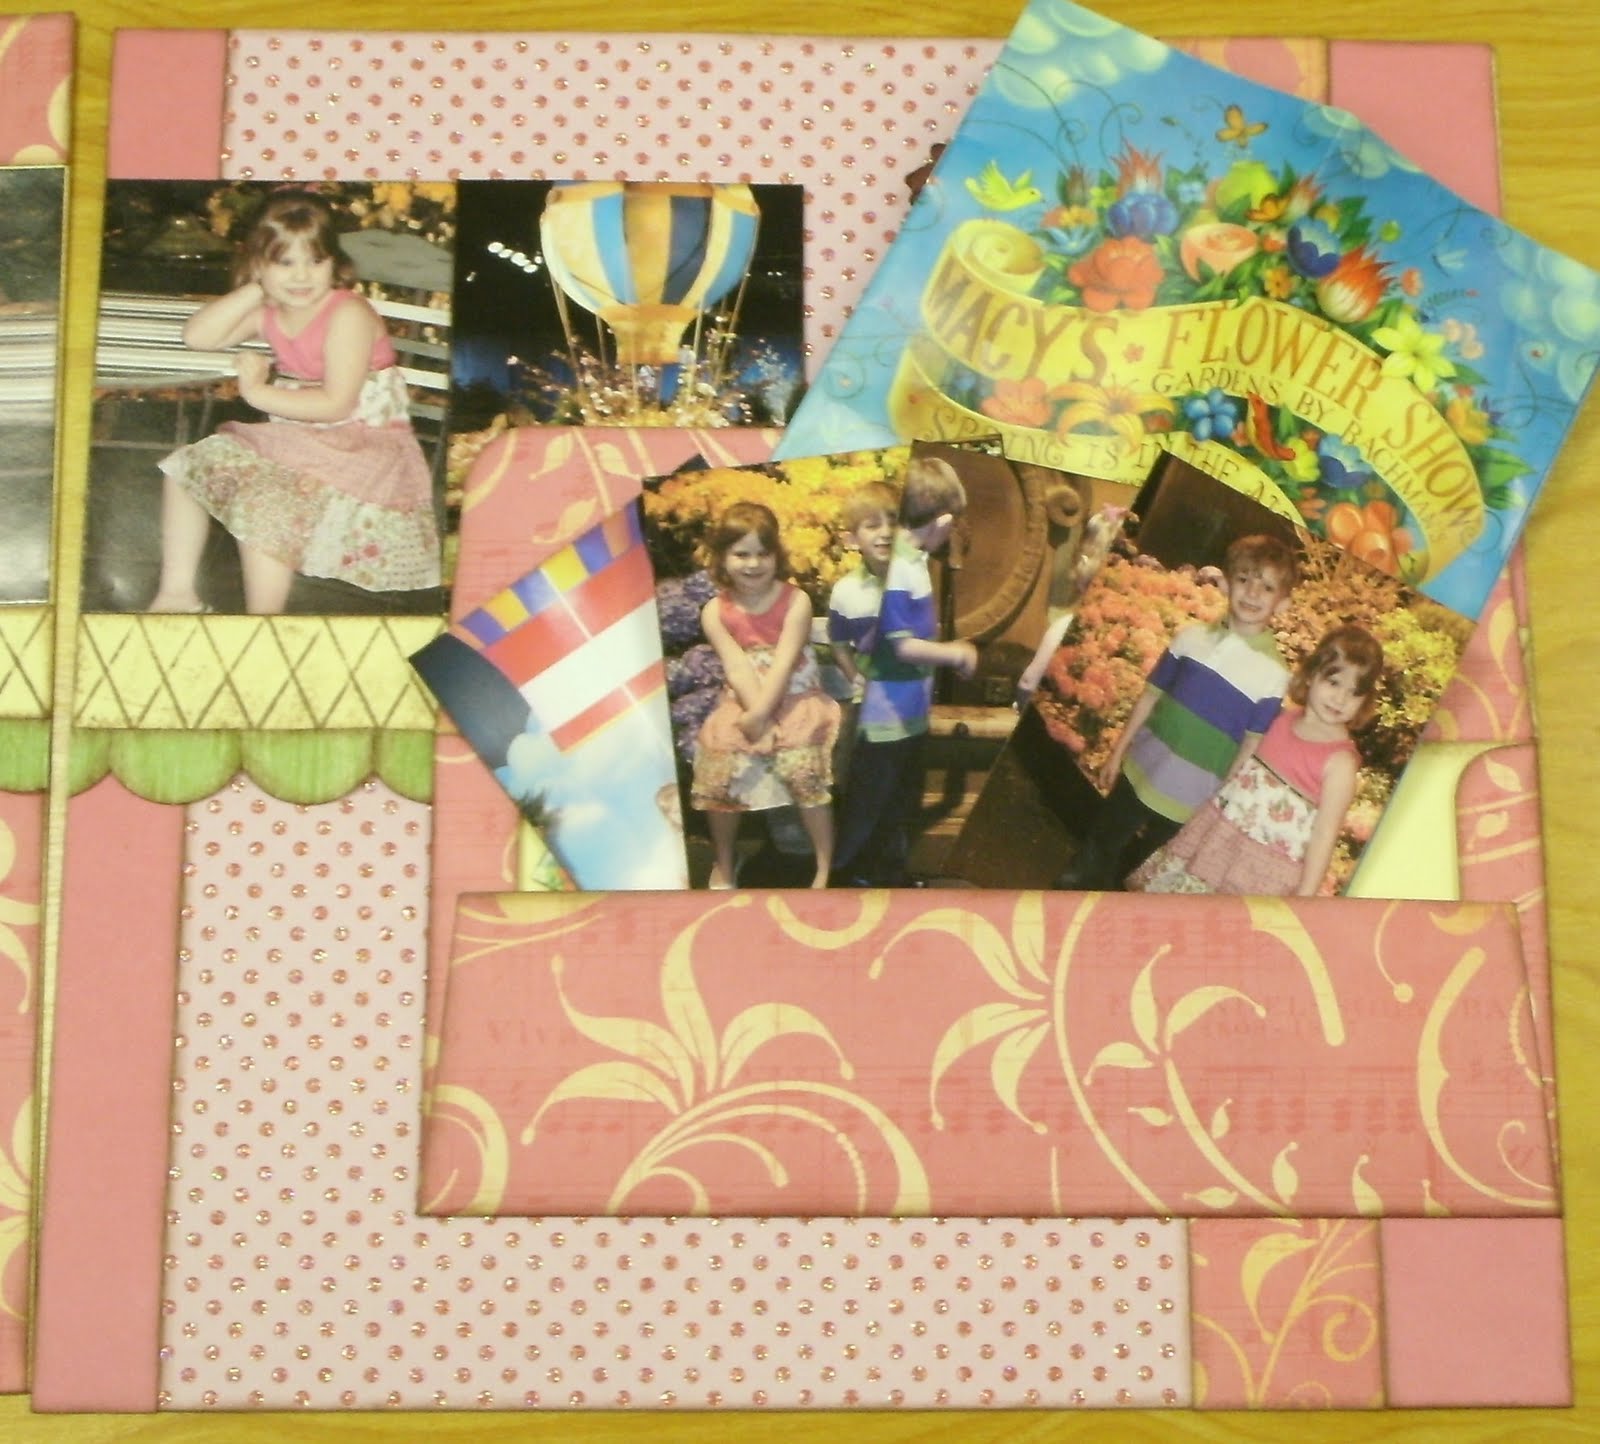
We are making it an annual tradition for my Grandma and I to bring Sam and Lucy to see the Macy's Flower Show on the 8th floor in Minneapolis.  Every year the display is fantastic!  It is also the perfect location to get great photos of the kids.  I had asked the kids to sit on a bench in front of one of the displays and then asked Sam to kiss Lucy on the cheek.  Well, Lucy turned to kiss Sam on the cheek at the same moment and luckily I had the camera at the ready for the moment!

The kit includes CTMH Flip Flaps.  These are so much fun and easy to use.  You can triple the amount of photos for each 4x6 position on your page.

Here is the other layout in the Miracle Kit.  Lucy had a tea party and invited her best friends over for her 3rd birthday.  All of the little girls dressed up in princess attire for the event.
This one shows the CTMH Flip Flap positioned horizontally.  You could place journaling or other memorabilia in the Flip Flap.  Ah the possibilities!
To place a layout with Flip Flaps into your album, simply cut a slit in the page protector for the Flip Flap to pull through.  Fun interactive layouts made faster, simpler, easier with Close To My Heart products!

Wednesday, October 21, 2009

Easter Waterfall Page

This is Lucy's Easter layout for 2008. More fun with the waterfall technique. This way I can put several photographs into one layout, and it doesn't get overly crouded. Instructions for the waterfall technique are in another post on my blog. The recipe for this layout is listed below the pictures.


Recipe:
X7107B 12" X 12" That's Amore Level 2 Paper Packet
X7107C That's Amore My Stickease® Assortment
X5643 12" X 12" Chocolate Cardstock
Z2111 Chocolate Exclusive Inks™ Stamp Pad
Z2166 Tulip Exclusive Inks™ Stamp Pad
Z1210 Heartfelt™ Wonder Die-Cuts
Z1145 Heartfelt™ Whimsy Die-Cuts
D1334 Reminisce
Z679 Liquid Glass

The title was cut using the striped “That’s Amore” paper and my Cricut Jasmine font cartridge.

The rabbits came as squirrels in the Heartfelt Wonder Die-Cuts, so I cut off their furry little tails and turned them into bunny ears.

Happy Scrapping!

Monday, July 27, 2009

Waterfall Album Meet Scrapbook Page

After completing the exclusive 2-page Animal Cookies Workshop On The Go layout (link to other post), I had another 16 photos from our Wiggles concert that I wanted to work into Lucy's scrapbook. I'm trying to edit, you know, not do three 2-page layouts for big events; I know crazy, isn't it! I just have a hard time letting good pictures stay in the computer. So I created an additional 2-page layout that holds all 16 photos, and it's interactive.

For Father's Day I created 2 waterfall albums, for my Husband and Dad. I also created 3 breast cancer themed waterfall albums for a friend. I credit Jennifer Zimmerman, my upline, for sharing the waterfall album inspiration with me. She had one as our make and take at a team meeting. She is so creative!

The idea seemed easy enough, in theory, to make a waterfall scrapbook page. Well, after trying, and trying, ripping it up, and trying again, I came up with something! I’ll try to explain, but honestly, I don’t really know how I put it all together. It was one of those “just keep trying” kind of projects.

I started with the 2-page layout from Cherish: Puzzle Junkie, featured in the Animal Cookies workshop on the go guide.

Instructions for a basic waterfall album can be found here. It’s difficult to explain, and Scrapbook-Crazy did such a fabulous job, they deserve the credit for making the tutorial. I’m sure there are also other good tutorials out there if you consult Google Search.

This waterfall album/scrapbook page has the pull at the top and the center fold at the bottom. I took a 12" by 5" piece and scored it, starting at 1", then every ½” for 13 total. Then I burnished all of the folds. I adhered an 11" by 5" piece overlapping the 1" to create a 22" by 5" complete mechanism. The 11" is the back half, and the 1" fold (from the 12" scored piece) should wrap around the 11" piece, to help from it getting caught on the anchor piece.

I attached 5x5 pieces of coordinating papers to each of the ½” sections on the mechanism using glue dots. I used patterned paper, instead of cardstock, for some of the pages, and that was a mistake. It was correctable, I just had to pull the paper off and put my journaling on cardstock to stiffen up the pieces. In the future I’ll use cardstock first for all of the pages, and then decorate with patterned paper. I was trying to keep it thin because I have so many pages, and forgot about the function.

I cut a 5½” slit in the polka dotted paper (anchor piece) 4” from the top of the patterned paper in the middle of my layout, for the back half of the mechanism to pull through, and to anchor the top half of the mechanism. I put a piece of packing tape on the back side prior to cutting to help strengthen it. The polka dotted piece is attached to the base cardstock on the sides, center and bottom. I left the top center adhesive free for the mechanism to be able to pull through.


To put the page into the page protector, I cut an opening in one side of the page protector from 5½” to 11½” and 3 ½” to 8 ¾” (measured from the top and left seam of the page protector). I opened the waterfall completely and slipped the page in the protector. The waterfall is able to function through the hole in the page protector, but it is still safe in your album.

For the pull, I set 5 eyelets in the top of the back of the mechanism and laced white ricrac through it, having the ends come out the center eyelet. Then I cut two 1 ½” circles and glue dotted the ends of the eyelet between them. I added a stickease with a button embellishment to the top, and a Velcro dot to the bottom. I put the other half of the Velcro on top of the page protector.

Oh, I also tried my first attempt at quilling. See the little heart. This is going to be my technique at the next co-team consultant art day. My Aunt Sue used to quill and she taught me how. I think it’s an artform that should not be lost. It is so fun and easy to do!

All in all, this project was a lot of fun. I will definitely try this one again. And if you have kids under the age of 6 - take them to a Wiggles Concert - you will not regret it!

Happy Scrapping!