Showing posts with label Layout. Show all posts

Sunday, July 27, 2014

Announcing my new Girl's Night Out and Scrappy Chic Rewards Club!

One Friday a month I'll open the Scrappy Chic Workshop for an evening of scrappy fellowship and creative fun! Bring your projects to work on, and I'll have a special project for you to create as well!

August 22, 2014, from 6:00 pm to Midnight will be the next GNO Club and this will be our project:
Skylark Today Was a Wonderful Day Layout
To create this project at the Club, simply order:
by August 3, 2014

Then Contact me to let me know you'll be here. And I'll supply and prepare the rest for you! If you can't make it on August 22, we can create this project at a time and place that works for you or for $5 I'll mail the project to you!

Upcoming 2014 Girl's Night Out Dates:
September 19 - Chalk It Up
October 24 - Scaredy Cat
November 14 - Pathfinding
December 19 - Yuletide Carol
_______________________________________________

Introducing the MY SCRAPPY CHIC REWARDS CLUB!

You can join any time, there is no commitment or obligation. It is a frequent shopper rewards program! I know that you have many choices in where you spend your crafting dollars, so I want to reward you for shopping with me. You can budget your purchases over a period of time and be rewarded with free products!

Here's how it works:
* Start your Club membership at any time by placing a $25+ order by contacting me or by using the My Scrappy Chic Gathering on my website when you place your order online.
* Your Club term will run 6 months from your starting month of choice. 
* Qualifying orders include all orders $25+. Including Studio J purchases, but excluding clearance items and cash & carry purchases.
* Club orders are due by the Selected Club Date except for Studio J purchases which can be placed at any time during the month.
* At the end of six months, I will add up your purchases (and those of any outside orders that you collect from friends/family not in the club), and you will receive CTMH Hostess Rewards in accordance with your retail spending total (excluding tax/shipping).
* Club membership is flexible, you can skip a month at any time.
* To keep your Club membership active, you must make purchases in at least 3 of the 6 months of your membership term.
* Your rewards are based on your cumulative 6 month spending total; the more you spend, the more you earn for FREE!

All one-time purchases of $150+ qualify for INSTANT Hostess Rewards, even without membership in the club!

Scrappy Chic Rewards Club membership is open to both long distance and local customers!

What are the benefits of Club membership?
* Earn $25 or more in FREE Close to My Heart products (depending on total spent during your 6-month Club term) (Click here for the detailed list of Hostess Rewards)
* Petite Perks stamp set ($2.95 retail value, to be your gift at the end of your 6-month term)
* Complimentary Idea Book
* Exclusive offers and sales for Club Members

Want to join? Send me an email and let me know! Orders are due by selected club Friday of each month. Shop with me and be rewarded!!!

Happy Scrapping!
Jen Lee
Independent Consultant
Close To My Heart
http://jenlee.ctmh.com

Sunday, February 19, 2012

Elemental Celebration Layout & Girls Night Out

This layout was created using the Parlor Trick template from the Magic How To Book from Jeanette Lynton. I used the Elemental Paper Packet paired with Sky, Pacifica, and Colonial White cardstock. The embellishments were created using the Art Philosophy Cricut Cartridge and the coordinating D1497 AP Celebration stamp set. This stamp set is only available with the Cricut Art Philosophy Collection from Close To My Heart. Right on the stamp set it gives you the size to cut the image ... now that's Faster, Simpler, Easier!

You are invited to crop at the Scrappy Chic Studio Friday, February 24, from 7:00 pm til Midnight. And again on the fourth Friday of each month. Join me for a girls night out. Bring your projects to work on and your scrappy kit. My stamps and tools will be available for your use during the crop. I will also have a create and take available for you to learn new techniques. Girls night out is free, and you are welcome to invite friends. Please contact me to RSVP.

The Elemental Celebration layout will be available for you to create at the Girls Night Out. Place a $25 order and the layout is free. It is also available a la carte for $10. Please let me know when you RSVP if you are interested in the layout so I can have yours cut and prepped for you to create.

Those who place $25+ orders each month can benefit from the rotating hostess club. The hostess brings a light snack to share to the girls night out, and receives the hostess rewards for the night's orders. The hostess can also increase her rewards by bringing in outside orders. We will choose next month's hostess at this girls night out.

Happy Scrapping!

Friday, February 17, 2012

Cookies With Santa - Altered PageMaps Sketch Layout

Thank you to my friend Marg over at I Didn't Have Potatoes for sharing this PageMaps sketch. You should check her blog out, she has some fabulous ideas! It inspired me so I decided to try it for my latest layout, our family outing with Santa. The sketch was originally for a 2-page 8 1/2 x 11 layout, but I made it into a 2-page 12 x 12 layout.

I used the now retired Believe Paper Packet from Close To My Heart; you can still get the papers in the Workshop On The Go Kit until February 29, 2012. I chose to distress the papers by taking the edge of my micro-tip scissors, while closed, and scraping along the edges of the papers. This makes a nice rough edge, without as much of a possibility for cutting my fingers. For the bigger pieces I then rolled and crinkled the edges to further distress.

I liked the notebook edge on the journal piece in the sketch. Since I wanted to use Desert Sand Cardstock for that piece, and didn't have a notebook edge cut available, I used my Cricut Art Philosophy Cartridge to cut a 1/4" circle then pressed the arrow 2 times to move the paper inward, cut another circle, press the arrow 2 times, then repeat 20 times. Afterward, I used my trusty scissors to cut out the space where the notebook wire would have pulled on the paper. Then I distressed it like the rest of the papers. I used the ruled stamp on D1303 Classmate Alphabet to create lines on the journal piece with Desert Sand Ink. And then hand wrote with my Topiary Marker.

The Santa title is stamped using the E1021 Trinity Alphabet and Holiday Red Stamp Pad. The embellishments were stamped with the D1494 Christmas Cheer set using the Black and Topiary Stamp Pads. I then used the Blending Pen with Holiday Red, Sky, and Sweet Leaf inks to color the stamped images. For the presents, I cut out the images using a Cutting Knife, including the box part of the images. I then placed patterned paper behind the stamped image to make it look like the packages were wrapped.

For the finishing touch, behind the stamped images, I stamped the snowflakes image from the D1494 Christmas Cheer set using White Daisy ink. This adds a subtle hint of texture to the base pages.

Happy Scrapping!
Jen Lee

Thursday, February 9, 2012

Sophia Layout: Lucy's Summer Day


Pin It
This was the first day that our son Sam went to Kindergarten, back in September 2009. Lucy missed her big brother. When the time came, we waited outside for the bus to bring him home. So Lucy passed the time eating chocolate chip cookies and picking dandelions. It was a nice afternoon.

This layout was created using the CTMH Sophia papers. They are now retired, but I'm trying to use my scrappy stash! The title letters and blooms were colored with a spray pen containing a mix of water, blush reinker, and pearl paint. I love the sheen this technique adds. Since the papers are so bright and cheerful, I chose to color the embellishments with the lightest color, and left them all the same color. This way they highlight the photos, instead of taking away from them.

Material/Supply List:
(All products from Close To My Heart)
Z1686 Cricut® Art Philosophy Collection
Sophia Paper Packet (Retired)
Pretty Pins (Retired)
Just Blooms (Retired)
Hollyhock Grosgrain Ribbon (Retired)
Z1326 Sparkles Red, Pink, & Purple Assortment
Z1380 Spray Pen
Z1039 Create-A-Shade™ Pearl Paint
Z2206 Blush Exclusive Inks® Re-Inker
Dimensional Elements Monograms (SMILE)
Cardstock Colors: Hollyhock, Blush, Pear, White

Happy Scrapping!
Jen Lee

Monday, October 3, 2011

Sam's 2011 Cover Page


At Sam's school in Minnesota, they take regular school photos in the fall. Then they take them again in the spring as a fundraiser. They use a much cuter background for the spring photos. And what better to do with a formal single photo, than a 1st page for the year's scrapbook. Yes, I'm the crazy one creating a scrapbook for each year of my kids’ lives. But since we only have 2 kids, I'm not creating a family album. This way the kids can take their own books with them when I'm ready to give them up.

When scrapbooking I'm most inspired by color in photos. I pulled the main colors out of the photo to create this layout. Using the black color as the base, it helps to pop Sam out of the background. Since there is such a variety of greens and blues in the background, I thought the Miracle paper pack from Close To My Heart would be perfect. But it was a little too light and airy for a big 7-year old! So I brought the color down by using the darker green buttons and brads as embellishments.

A few of the products in this layout are retired, but I've got to use my stash sometime! You can do the same, simply pull 4 colors out of your photos and start playing with it.

Happy Scrapping!
Jen Lee


Materials List:
X7133B Miracle Level 2 Paper Packet - retired
C1452 Delight Stamp Set
B1362 Tag the Occasion Stamp Set
1386 Black 12x12 Cardstock
Topiary buttons & brads from my stash

Saturday, March 12, 2011

Destressing and Distressing in Wisconsin

We're scrapping away at a retreat this weekend. I'll be sharing my projects over the next few days. Right now I'm thinking about Spring, and opening up our cabin. In 2009 we opened the cabin over Mother's Day weekend, it always feels good to go back up there again. The first few weekends are always more work, with cleaning and repairing from the winter. But it is all worth it! Here are the kids layouts from that cabin opener ...


It makes things go more quickly to duplicate rather than create anew. When scrapping a family event, I usually try to do both of the kids layouts at the same time.


Recipe:
Pattern Imagine: Overture
X7138B Fanfare Paper Packet
E1014 Posterboard Alphabet
Z2192 Pacifica Stamp Pad
Z2116 Cranberry Stamp Pad
Y1004 2 1/2" Square My Acrylix Block
Z1151 Foam Tape
Sassy Strands

The most important part for this layout was my handy trusty micro-tip scissors. I used them to distress all of the edges of the paper and photos. It adds a lot of texture.

If you click on the picture to make it larger, you can take an extra look at the wide band at the bottom of each layout. For this pattern it is recommended to cut the paper 1/2" wider than the space will allow so that you can tear off the top 1/2" to have that fun torn paper texture. Since I scissor distressed the edges, I decided to take another spin on the distressed ruffle technique instead. I ran adhesive on the backside along the top and bottom of the 4 1/2" strip of paper. Then I placed another run of adhesive about 1 1/2" from the top. When I applied it to the base cardstock, I first stuck the bottom down, then made the paper into a "hill" and stuck the top edge down just below the other paper pieces. I pushed the paper up from the bottom until that middle run of adhesive took hold. This made a smaller "hill" at the top of the paper. I squashed that down with my hands, ran the bone folder under it to open up the hill again to soften up the paper a little more, then squashed it down again. This just added an extra texture to the layout.

Happy Scrapping!
Jen Lee

Friday, March 11, 2011

Fun Friday

This weekend I'm over in Wisconsin at a retreat cabin enjoying scrappy time with some lovely ladies. It has been a productive weekend so far, and we didn't get here until Noon yesterday!

I've organized my albums through 2010. To do that I put notes in each page where a layout is going to be placed, then put the page protectors in the book, so I can build it as I go. I started doing this because of my classes. Now I can skip around time while doing layouts without losing my mind. Well that happens too, but for other reasons. ;-)

I've also gone through and re-organized my stamps, when you share they rarely end up back how they started. I store my stamps in My Acrylix Organizers; 15 sets per box. These are the most fabulous stamp organization ever, as they are made to fit the stamp sets perfectly. The Double Scrubber (stamp cleaner) fits in the box as well. I keep a 3-ring binder with sheet protectors in it, with a page for each stamp set. This way you can page through the book, choose the set you want, and find it easily as they are stored by number in the Organizers. This is really important when you accumulate multiple boxes full of stamps. Being a CTMH Consultant certainly has its perks!

After all of that organizing, I did a little creating. It's not the most exciting layout, but it's fun to celebrate the little things. This was Lucy's first night sleeping in her "Big Girl Bed".

Recipe:
Pattern - Magic: Juggling Act
X7127B Magnifique Paper Packet (the sky blue paper)
X7128B Olivia Paper Packet (the pear green paper)
X7129B Hooligans Paper Packet (the gypsy purple paper)
X5760 Cotton Candy Cardstock
1385 White Daisy Cardstock
Z1311 1 1/4" Circle Punch
Z1252 Cutting Knife
Z1114 Piercing Tool Kit
Z1151 3-D Foam Tape
1772 Glue Dots
Z341 Mini Glue Dots

As you can see by the mix of papers and cardstock that I put together my own colors based on the pictures for this layout. CTMH papers are so versatile, you can mix and match easily using some simple color rules; basically choose 3-4 colors that compliment your pictures along with a neutral to ground it.

The title is digital. I simply typed in word, made it big, printed it out, and used the uber-fabulous CTMH Cutting Knife to detail cut out the letter. This layout actually doesn't use any stamping. As I said earlier in this post, I've already spent some quality time with my stamps, so we needed a little break from each other. Today is a new day, and I plan to get my "INK" on! Check back tomorrow to see what comes of it.

Happy Scrapping!
Jen Lee

Tuesday, July 6, 2010

Washington DC - Here I come!

I'm off to the National Close To My Heart Convention in Washington DC in the morning.  I'll post updates with exciting new products, tips, and ideas as I learn them.

We are having a team meeting tomorrow evening.  In order to attend they've asked each of us to create a 9x9 layout about us.  Here is my layout:


The hardest part was finding the right picture.  But I gave up vanity and chose the most recent with my whole family all smiling!  This is from Lucy's gymnastics recital.  It was so cute!  Imagine a couple dozen 3-4 year olds, some with parents, doing a mini-routine to "Home On The Range".

The layout went together very quickly.  I used Close To My Heart's "Splendor" papers and stickease and the "Hot Diggity" stamp set.  For embellishments I used Dimensional Elements On Target, Irrisistables Pizzazz Chipboard Die-Cuts, Autumn Harvest Brads Assortment, Liquid Glass, and the Glitz Stardust Glitter Glue.

To make the butterfly appear to be flying and the bird appear to have ruffled feathers, I stamped and cut out the image twice and layered them on top of each other adhering only the body.  Then I curled the wings and feathers of the top image to give it the 3D effect.

Watch for updates in the next few days from Convention!

Sunday, April 25, 2010

Catty the Caterpillar

Two summers ago we were playing in a sand pile in the yard.  Sam happened upon a caterpillar.  He spent the afternoon with it on his shoulder.  He tried to feed it leaves and named it "Catty".  Pretty original, I know.  But it was adorable!  We took pictures to remember his little pet then set him free.

One of my favorite things to do in layouts is to blow up a photo.  Have it set as a focal point and pair it with supporting photos.  Lately when I've been printing photos, I'll print enlargements of my favorites.  This way when I'm ready to do the layout I have a few options available.  Happy Scrapping!

Saturday, April 24, 2010

Lucy as Snow White - Trick or Treat!

Every once in a while photos lend themselves to be placed with pre-printed pages.  They have adorable pre-printed Disney pages over at the Scrapbook Shop along with coordinating glitter printed pages.  Pair that with white cardstock and a heart scallop punch from a dollar store and you have a fun layout!

Friday, April 23, 2010

Sam's New Bike

Sam's birthday is 3 days after Christmas.  That is kind of a lot for a little guy.  So last summer, at 5 1/2, we went and picked out a new bike for his 1/2 birthday.  He is still warming up to it, but is starting to relax and enjoy the ride. 

I created this layout using black, red, and blue solid cardstocks, silver mirrored cardstock, a grey patterned paper, and my Cricut.  The Going Places cartridge has the bike and wheel cuts and Plantin Schoolbook is the font.  I used the 1 1/4" circle punch to create the jumbo scallop around the photo on the right.  The big letters "Bike Ride" are chalkboard chipboard that were pre-cut.  They were in my stash waiting for the right pages.

I could have gone with Transformers patterned papers or something like that, but sometimes simplicity makes a better layout.  It's all in what you make of it.

Happy Scrapping!

Thursday, April 22, 2010

Black White and Hot Pink All Over

These are Lucy's Fall preschool individual and class pictures. 

Last weekend we went to Duluth for a scrapbooking retreat.  For an outing we popped by the local scrapbook shop "True Colors".  They had these adorable black, white, and hot pink patterned papers, and glittered cardstock stickers.  They went perfectly with some black and white glitter cardstock that I had from the Scrapbook Shop of St. Paul.  I love this color combo!

To make a jumbo scallop around a photo, use a 1 1/4" circle punch, put whole circles under the four corners.  For the sides, cut the circles in half and adhere them along the sides.  Eazy peazy!

Wednesday, April 21, 2010

Sam's Spring 2010 Kindergarten Photo

So, when did they start taking school pictures twice per year?  And with the Spring photos, they send home the pictures first then expect you to send them back if you don't want to pay for them.  What a great plan for a fundraiser, cause who can turn down pictures of their own child?  Anyway, what to do with only one picture and two pages?  Think of your favorite song, maybe one with some advice you would like to impart.

I chose "The Words I Would Say" by Sidewalk Prophets.
Be strong in the Lord and,
Never give up hope,
You're going to do great things,
I already know,
God's got His hand on you so,
Don't live life in fear,
Forgive and forget,
But don't forget why you're here,
Take your time and pray,
Thank God for each day,
His love will find a way,
These are the words I would say.

This layout is also a sneak preview for the new Summer Idea Book.  The Spendor paper pack is one of four new packs that will be available beginning May 1!

Tuesday, April 20, 2010

Monday, April 19, 2010

Lucy's 3rd Birthday - Layout 2 of 3

For birthday's I usually do 2-3 layouts for the kids.  Mostly because that is when I take the most pictures and don't want to leave anyone out who was there.  For Lucy's 3rd birthday, the first layout was done in the Miracle Kit, see the next post.  This layout was created using a retired paper pack and stickease and some very cute brads that I found at Bargain Bill's in Rice Lake, WI. 
There were too many pictures left over that I wanted to use, but I did not want to have 4 layouts for her birthday, so I compromised and made flaps for the additional pics.  When I put the layout into page protectors, I'll make a slit in the protector and pull the flap through so it can be opened when looking at the layout.
Thanks for looking!
Jen

Friday, April 16, 2010

My Miracle Kit Layouts

The new Miracle Kit from Close to My Heart is available now until the end of May 2010.  This kit includes product and directions to complete two wonderful layouts.  They were a snap to put together - four pages in under two hours!

The kit allows for some color interpretation.  You can pick a color from your pictures as the coordinating color for the embellishments to make the layout all your own!

We are making it an annual tradition for my Grandma and I to bring Sam and Lucy to see the Macy's Flower Show on the 8th floor in Minneapolis.  Every year the display is fantastic!  It is also the perfect location to get great photos of the kids.  I had asked the kids to sit on a bench in front of one of the displays and then asked Sam to kiss Lucy on the cheek.  Well, Lucy turned to kiss Sam on the cheek at the same moment and luckily I had the camera at the ready for the moment!

The kit includes CTMH Flip Flaps.  These are so much fun and easy to use.  You can triple the amount of photos for each 4x6 position on your page.

Here is the other layout in the Miracle Kit.  Lucy had a tea party and invited her best friends over for her 3rd birthday.  All of the little girls dressed up in princess attire for the event.
This one shows the CTMH Flip Flap positioned horizontally.  You could place journaling or other memorabilia in the Flip Flap.  Ah the possibilities!
To place a layout with Flip Flaps into your album, simply cut a slit in the page protector for the Flip Flap to pull through.  Fun interactive layouts made faster, simpler, easier with Close To My Heart products!

Monday, November 16, 2009

Puddle Jumping - Lee Family Style (2 of 2)


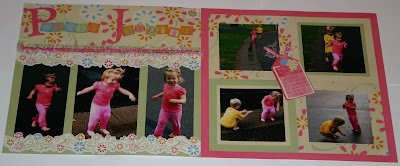
This is Lucy's layout of our fun afternoon jumping in the puddles in the street.  It was created with the retired My Reflections Best Friends Forever Level 1 Kit and Designer Ribbon Rounds™ Sorbet Collection

Level 1 kits make scrapbooking so fast and easy!  Pages are preprinted with the design so all you have to do is crop and place your pictures and title and embellish as you like with the coordinating stickease that come in the kit.  You can add matching embellishments as well to make the layout as detailed as you desire.  Click here for all of the Level 1 kits that are currently available.

Monday, November 9, 2009

Grace's Dance Competition


Lucy and I went to see Grace perform in her dance competition in the Spring of 2008.  Lucy thought it was so much fun seeing all of the other kids dressed up in costumes dancing on the stage.  She even did some dancing in the aisles!

Recipe:
Notebook Papers & Stickease
Chocolate Alphabet Large
Whooo Loves You
Classmate Alphabet
Adorning Corners
Versamark Stamp Pad
White Embossing Powder
Black Exclusive Inks Stamp Pad
Desert Sand Exclusive Inks Stamp Pad
Hollyhock Exclusive Inks Stamp Pad
Crystal Blue Exclusive Inks Stamp Pad

Sunday, November 8, 2009

Sam's T-Ball Pictures from Spring 2008


Sam played T-ball in the spring of 2008. Darrin was the Assistant Coach. We played rotating ISD-15 fields Monday and Wednesday evenings for 6 weeks. We did not keep score. Most of Sam's time was spent making designs in the sand in the outfield. When he actually tried to hit the ball, he generally made contact, and sent the ball all the way into the outfield. Which was a feat, since most of his teammates barely hit the ball to the pitcher’s mound.

The night we went to take team pictures, all of the ISD-15 teams gathered at the Elementary School playground and took turns taking individual and team pictures. There were several hundred people there; including parents, grandparents, and kids. After pictures, Sam and Lucy played on the playground for a while. All of a sudden, Sam walked over the edge of the park, dropped his pants to his ankles, and peed into the grass. We all got quite a chuckle out of that.

Needless to say, this wasn't Sam's sport.  Maybe we'll try again in first grade, if he wants to.  Sam is just not really a sports kid, but if Lego was a sport, he would definitely score in the big leagues!


The left page is a 12 x 12 print of the action on the field.  Sam was playing pitcher while Darrin was trying to keep the infielders in line.  If you want to learn patience, coaching little league T-ball is a great place to start!

These layouts utilize minimal papers.  Just CTMH black cardstock, vellum, and two sheets of double sided T-Ball themed paper that I found at the Mora scrapbooking store.  The2008 ribbon was cut off of his medal.  We got the trading cards and button with his picture package.

Friday, November 6, 2009

Lucy: I'm Washing My Hair


I am a big fan of scrapbooking the little moments that make life fun!  This is another layout from 2008.  Darrin and I had been battling it out in a video game, and Lucy was playing quietly between us.  Somewhere in there, she disappeared.  I went out to check on her and found her in the bathroom applying lotion to her hair!  It took about 6 weeks for her hair to return to normal, this always makes me smile when I see it.

Recipe:
Boom di Ada paper pack
Love Letters Rub-Ons
Letters cut with Cricut ZooBalloo Cartridge out of White Daisy Cardstock
My Acrylix® Stamp Set Free Spirit
Just Blooms™ White Daisy Variety Pack
Designer Ribbon Rounds™ Hollyhock Collection
Mini-Medley Accents Autumn Garden Collection